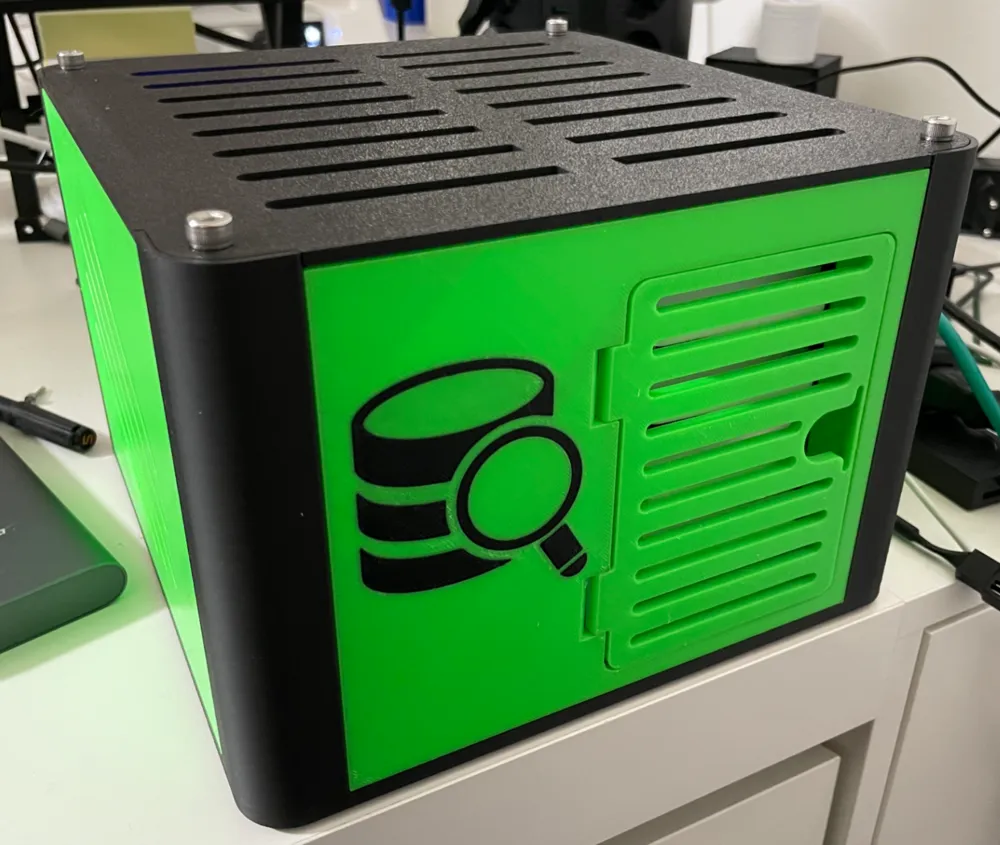
A Raspberry Pi 5 NAS case needs to do more than hide the electronics. Five drives, SATA extensions, cooling, power wiring, and network cables must stay organized and accessible. The enclosure also needs enough airflow to keep the storage reliable during long transfers.
I designed this 3D-printed enclosure around those practical requirements. It houses a Raspberry Pi 5, the Radxa Penta SATA HAT, and up to five 2.5-inch drives. Removable trays, active cooling, accessible connections, and a clean desktop format turn the electronics into a NAS that is easy to maintain.
Why I designed this Raspberry Pi 5 NAS case
- Up to five 2.5-inch drives: for example, the vertical layout uses space efficiently while keeping every drive accessible.
- Independent drive trays: in addition, each SSD or 2.5-inch hard drive can slide out without disturbing the other disks.
- Active airflow: therefore, an 80 mm fan moves air across the drive stack instead of relying on passive ventilation alone.
- Clean front access: meanwhile, a hinged door gives direct access to the drives and hides the connectors during normal use.
- Accessible controls: in addition, the Raspberry Pi microSD card and power-switch area remain reachable from the bottom.
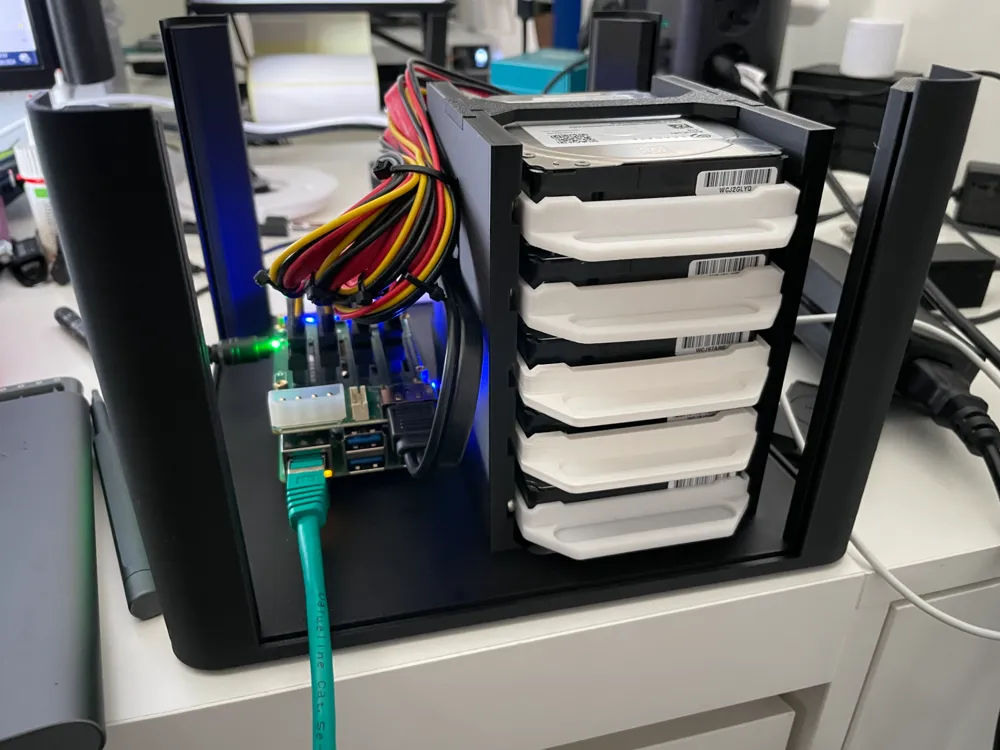
- Practical rear panel: LAN, power, an optional network switch, and an optional Noctua fan controller have dedicated space.
- Cable management: as a result, internal room for wiring prevents SATA and power cables from blocking airflow.
- Stable, ventilated base: finally, silicone feet prevent slipping and raise the case slightly to improve intake airflow.
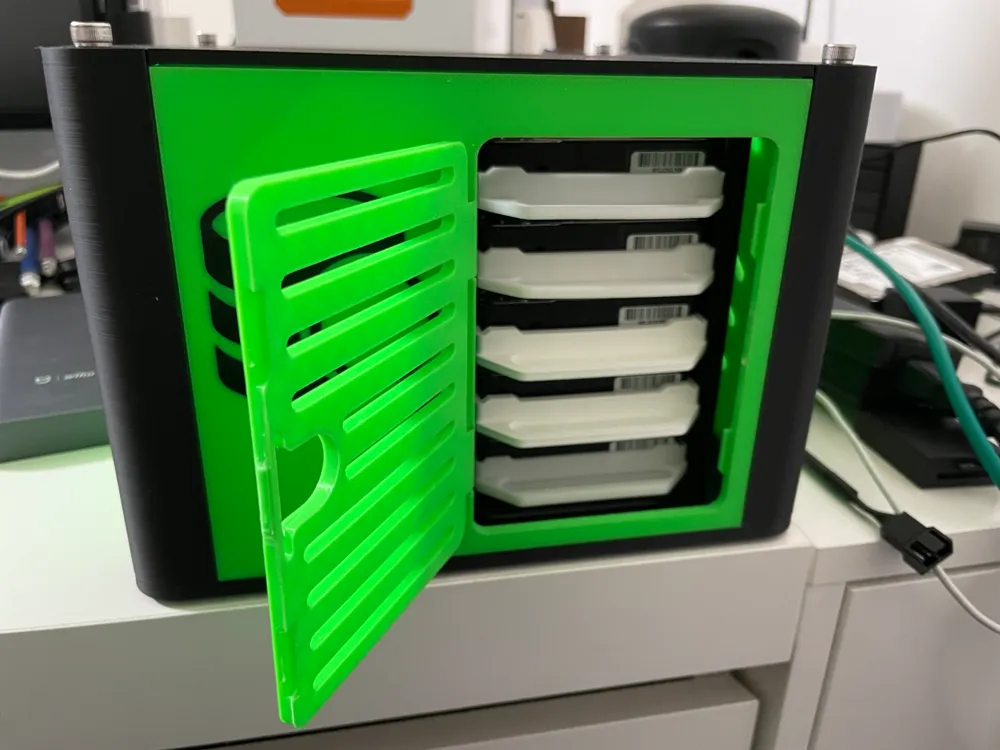
Raspberry Pi 5 NAS case electronics
- Raspberry Pi 5
- Radxa Penta SATA HAT
- One to five 2.5-inch SATA SSDs or hard drives
- A suitable power supply for the Raspberry Pi, SATA HAT, and installed drives
- A microSD card for Raspberry Pi OS Lite
First, test the Raspberry Pi, HAT, and at least one drive before installing them. As a result, this simple check makes it much easier to identify a power, cable, or storage problem before the enclosure is assembled.
Raspberry Pi 5 NAS case materials and component links
The links below are example parts used for the original project. However, product listings can change, so compare the dimensions and connector orientation with the MakerWorld files before ordering.
Fasteners
- 4 × M5×10 DIN 912 screws for the top panel
- 2 × M3×6 DIN 912 screws for the Noctua fan controller
- 2 × M3×10 DIN 912 screws for the LAN panel
- 10 × M3×16 DIN 912 screws for the SATA male-to-female adapters
- 10 × M3 nuts for the SATA adapters
- 20 × M3×8 screws for mounting the drives to their holders
- 4 × M2.5×8 screws for mounting the Raspberry Pi to the base; the Radxa HAT includes the required copper spacers
Cables, cooling, controls, and feet
- 1 × 90-degree left-angle Ethernet male-to-female extension
- 5 × 22-pin SATA 7+15 male-to-female adapters
- 1 × panel-mount metal power button (optional)
- 1 × 5.5 × 2.1 mm panel-mount DC socket
- 1 × Noctua NF-A8 5V PWM 80 mm fan
- 1 × Noctua NA-FC1 PWM fan controller (optional)
- Approximately 90 mm of 1.5 mm metal wire for the door hinge
- 4 × 12.6 mm self-adhesive square rubber feet
- 5 × 22-pin SATA data-and-power extension cables
Therefore, treat these links as convenient references for component identification. They are not a guarantee of compatibility if a seller changes the product.
Print profile for the Raspberry Pi 5 NAS case
- 0.2 mm layer height
- 3 walls
- 20% infill
- PLA for the published print profile
The complete profile uses about 867 g of PLA across the printed parts. MakerWorld estimates approximately 26.9 hours for the supported Bambu Lab profile. However, your material use and print time will vary with the printer, filament, and slicer settings.
Raspberry Pi 5 NAS case assembly order
- Test the electronics. Connect the Raspberry Pi 5, Penta SATA HAT, one drive, cooling fan, and power supply outside the case. Then, confirm that the disk is detected.
- Prepare the drive trays. Next, mount each 2.5-inch drive to its holder with the specified M3 screws. However, do not overtighten screws against printed parts.
- Fit the SATA adapters. Then, align every connector carefully. Afterward, make sure each tray moves without pulling on its cable.
- Mount the Raspberry Pi and HAT. Use the supplied copper spacers where required. Keep the microSD card and power-button area clear.
- Install the fan. Route its cable away from the blades. Add the optional PWM controller if you want manual control over noise and airflow.
- Route power and Ethernet. Fit the panel-mount socket and right-angle network extension. Secure loose cables inside the enclosure.
- Test all drives again. Check disk detection, fan operation, network connectivity, and temperatures before closing the panels.
- Fit the door, top, and feet. Use about 90 mm of 1.5 mm wire for the hinge. Add the silicone feet to improve grip and bottom airflow.
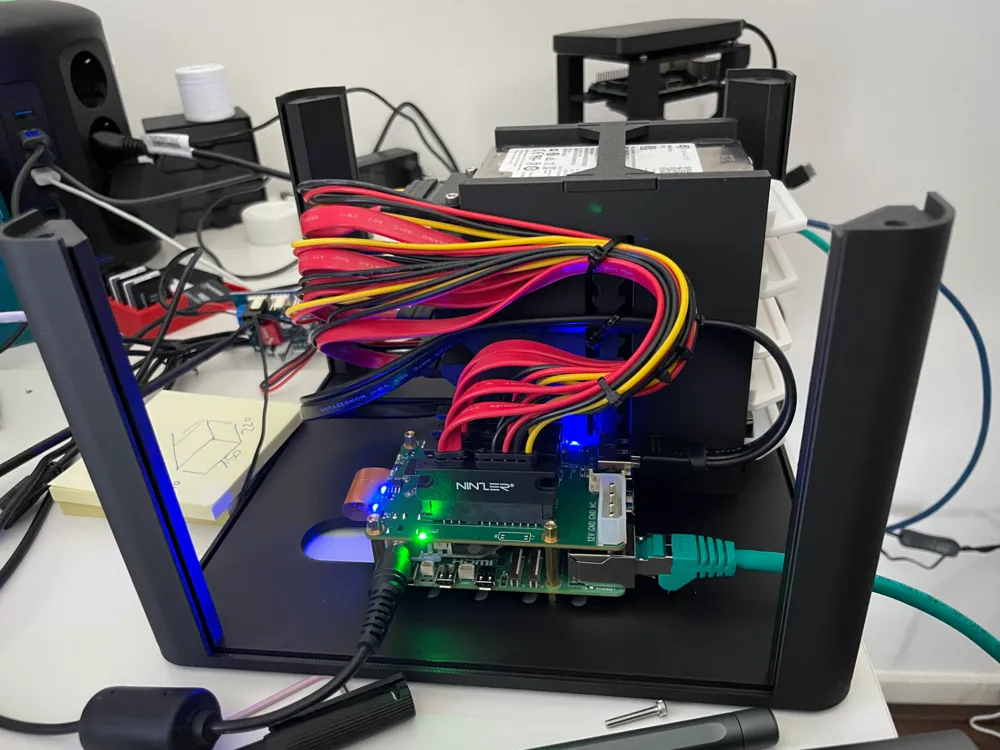
SATA cable routing
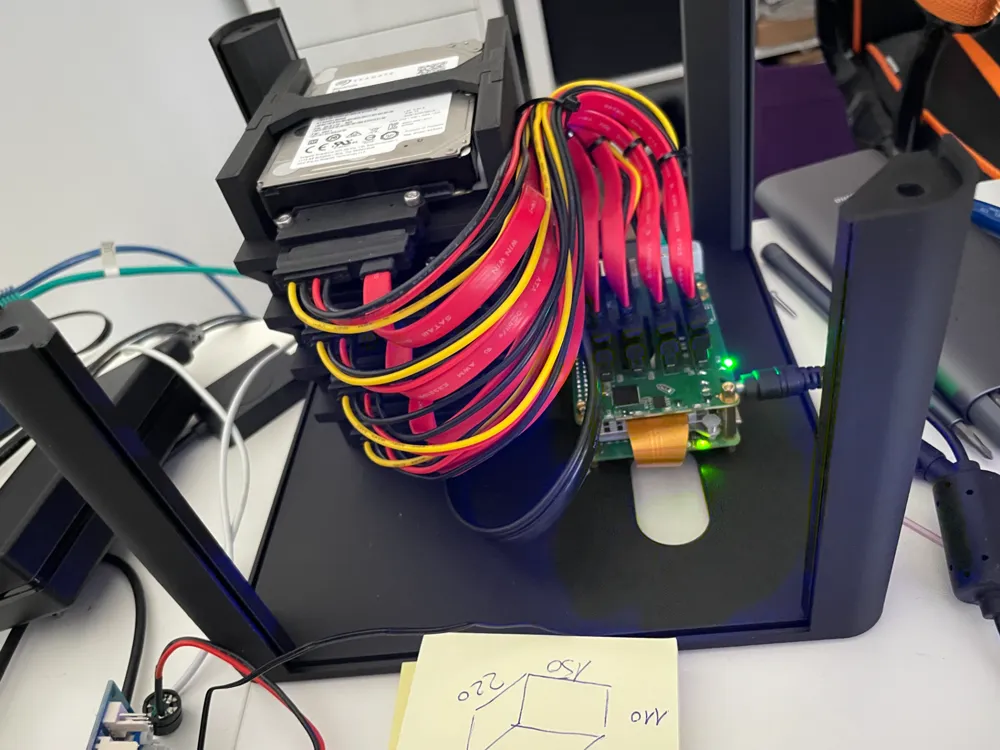
First, connect and label one drive at a time. Then, keep the SATA cables in a smooth curve and avoid sharp bends near the connectors. In addition, the trays should move without placing tension on the adapters. Finally, cable ties can control larger loops, but leave enough slack to service each drive.
Cooling and storage considerations
Five drives in a compact Raspberry Pi 5 NAS case can generate meaningful heat, even when most are SSDs. Therefore, keep the vents clear and confirm the fan direction before final assembly. Next, monitor drive temperatures during the first long transfer or RAID rebuild. Meanwhile, the optional PWM controller helps balance airflow against noise.
This enclosure is designed for 2.5-inch drives. However, if you need 3.5-inch disks, choose a case made for their larger dimensions, power requirements, and heat output. A community-designed 3.5-inch variant is linked from the original MakerWorld description.
Software: Raspberry Pi OS Lite and OpenMediaVault
I use Raspberry Pi OS Lite with OpenMediaVault for this build. The headless installation stays lightweight. In turn, OpenMediaVault manages storage, shared folders, users, SMB or NFS services, monitoring, and updates through a web interface.
Finally, before creating an array or copying important data, confirm that every disk appears with the expected capacity and serial number. Therefore, choose RAID, independent disks, or another storage layout according to your recovery plan. However, RAID can improve availability, but it does not replace a separate backup.
Download the Raspberry Pi 5 NAS case
The current model files, print profile, detailed hardware list, community makes, and future revisions are available on MakerWorld.
If you print the enclosure, share how you configure the drives, cooling, and front panel. You can also browse more WikiZell 3D-printing projects for practical ideas and printable hardware.